> ## Documentation Index
> Fetch the complete documentation index at: https://docs.macropay.ai/llms.txt
> Use this file to discover all available pages before exploring further.
# How to automatically share links to customers after purchase
> Use a Custom Benefit to deliver private links, docs, or onboarding steps to every customer automatically the moment payment clears.
Selling a Discord invite, a private Notion playbook, a Calendly link for an onboarding call, or a download URL? You don't want to email those by hand on every sale. A **Custom Benefit** attaches that content to a product once, then Macropay delivers it automatically the instant a payment succeeds — on the confirmation screen, in the receipt email, and in the customer portal.
Because Macropay is your **Merchant of Record**, that same purchase also handles sales tax and VAT remittance for you. You wire up the link once; we handle entitlement delivery and the global tax paperwork on every order.
A Custom Benefit is the free-form member of the benefits family. The **Private note** is the payload — it's revealed only after a successful payment, so it's the right place for any link or content you want gated behind a purchase.
## What you'll build
1. A reusable **Custom Benefit** that holds your link and a description.
2. A **product** that grants that benefit automatically on purchase.
3. Automatic delivery of the link across checkout, email, and the customer portal — no manual follow-up.
## Step 1 — Create the Custom Benefit
In the Macropay dashboard sidebar, select **Benefits**.
Direct link: `https://macropay.ai/dashboard/${org_slug}/products/benefits`.
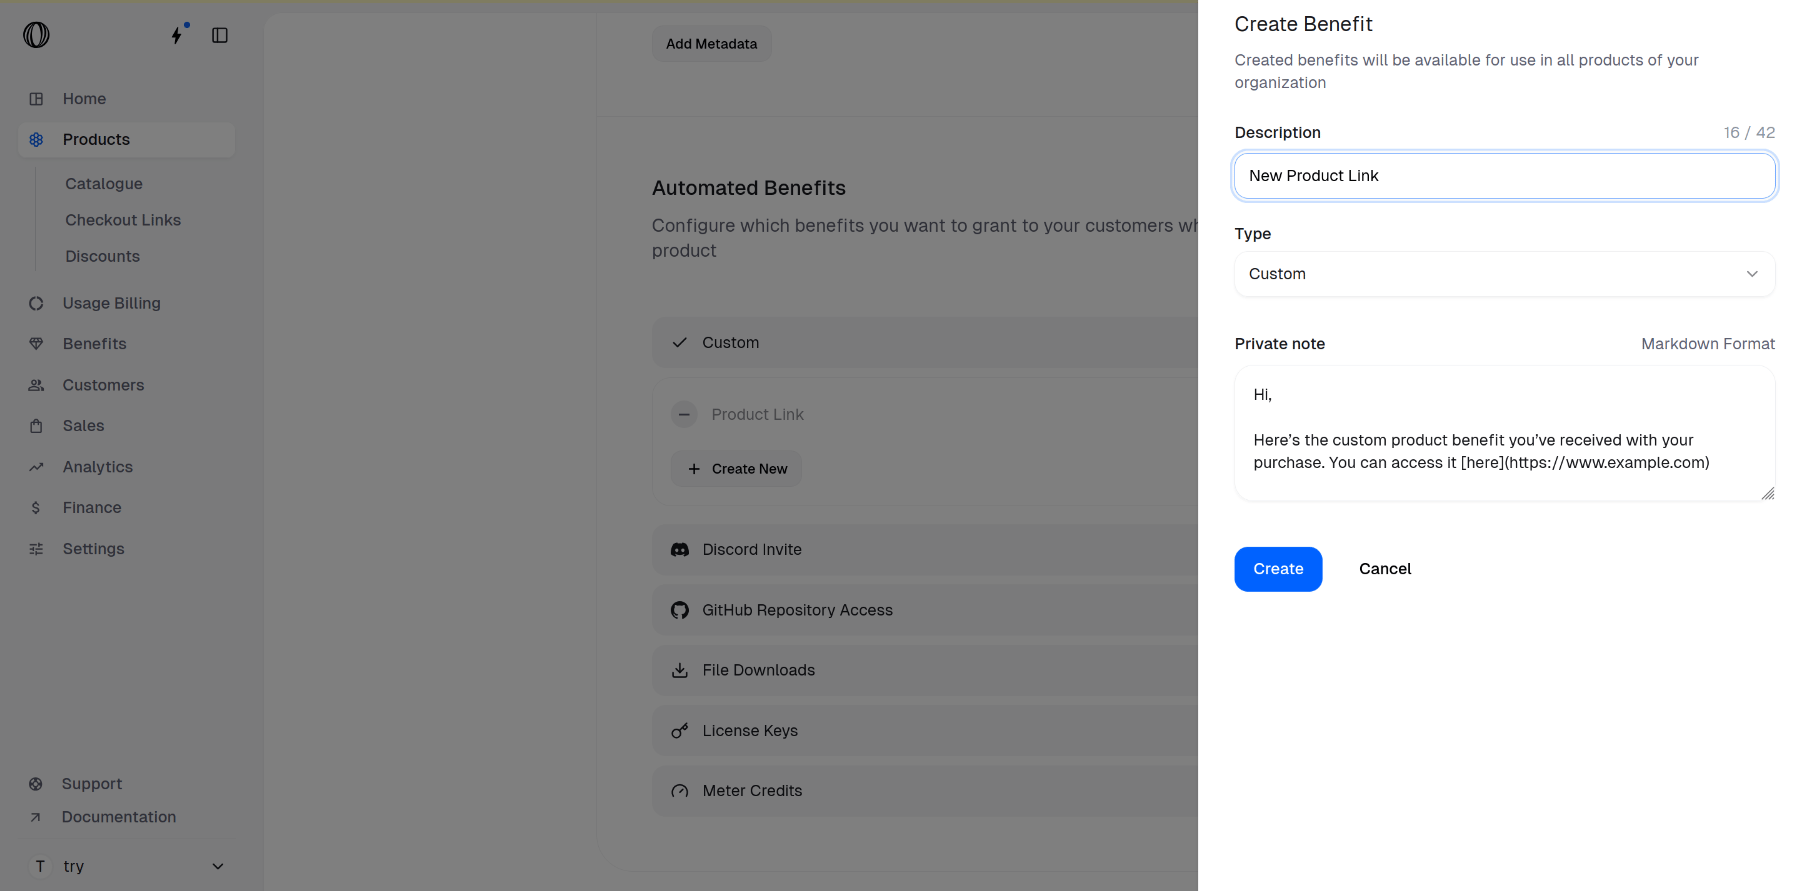
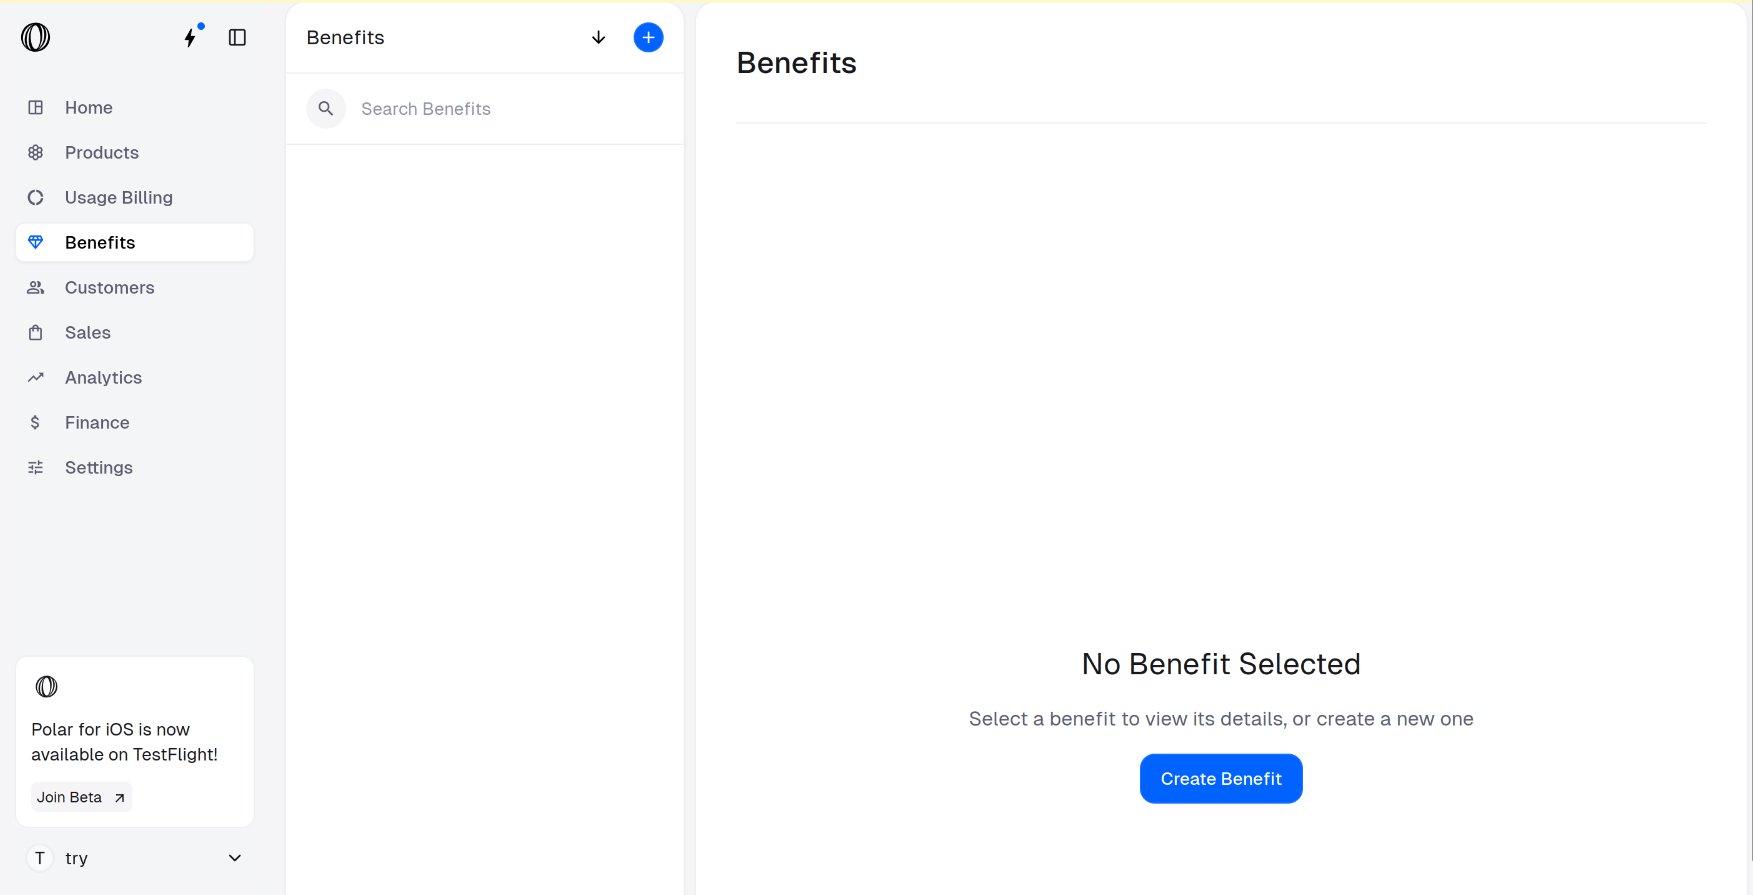 Click **Create Benefit**. You'll see three fields: **Description**, **Type**, and **Private note**.
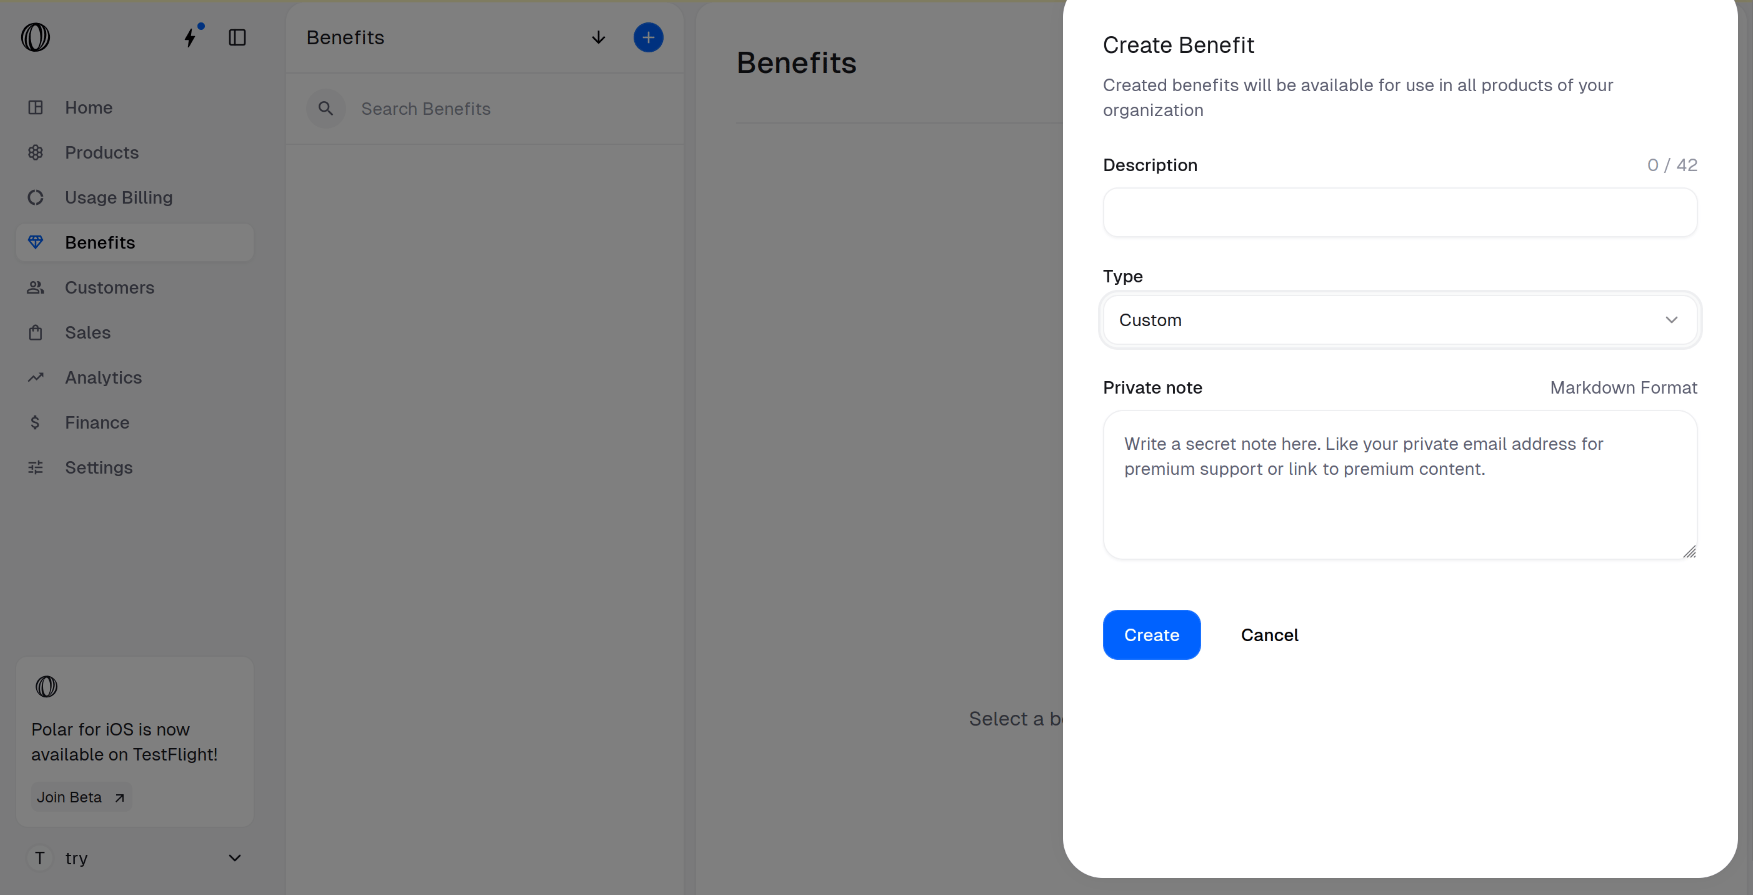 **Type** defaults to **Custom**, which is exactly what we want here.
The **Private note** field belongs to the Custom type. Pick a different **Type** — license keys, file downloads, GitHub or Discord access — and the form swaps in fields specific to that benefit instead.
Fill in the two content fields:
* **Description** — plain text. This is the label the customer sees for the benefit (e.g. *"Onboarding call booking link"*).
* **Private note** — supports [Markdown](https://www.markdownguide.org/basic-syntax/), so you can add formatted text, bullet lists, and one or more links.
Put the actual link inside the **Private note** so it stays hidden until payment clears. Then click **Create**.
**Type** defaults to **Custom**, which is exactly what we want here.
The **Private note** field belongs to the Custom type. Pick a different **Type** — license keys, file downloads, GitHub or Discord access — and the form swaps in fields specific to that benefit instead.
Fill in the two content fields:
* **Description** — plain text. This is the label the customer sees for the benefit (e.g. *"Onboarding call booking link"*).
* **Private note** — supports [Markdown](https://www.markdownguide.org/basic-syntax/), so you can add formatted text, bullet lists, and one or more links.
Put the actual link inside the **Private note** so it stays hidden until payment clears. Then click **Create**.
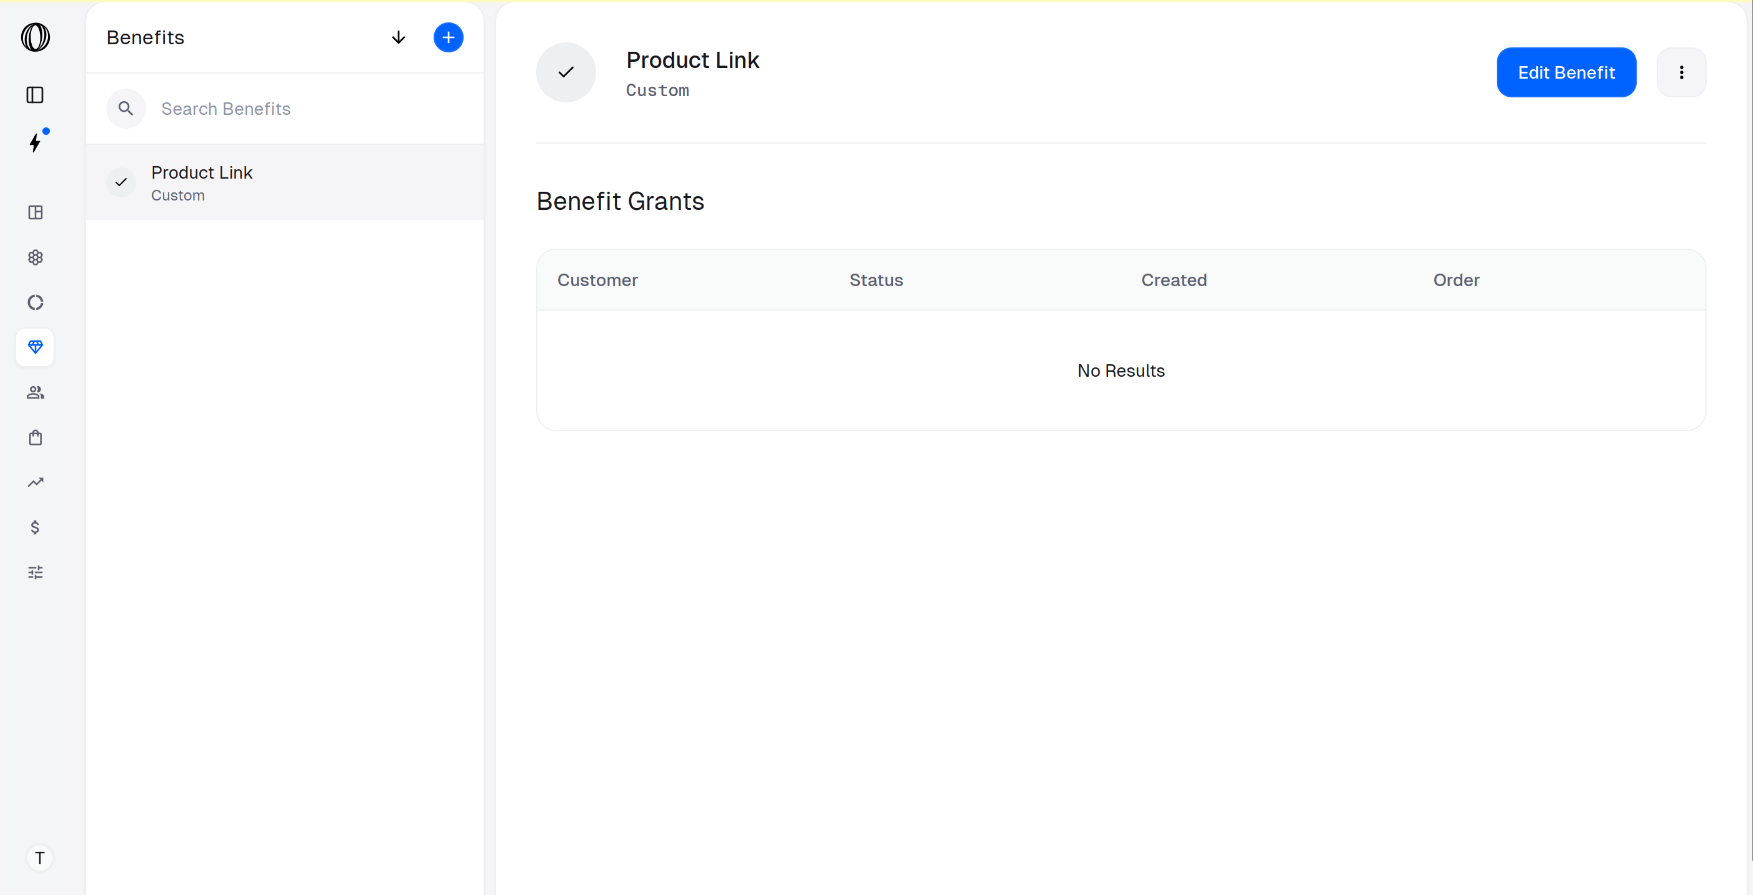
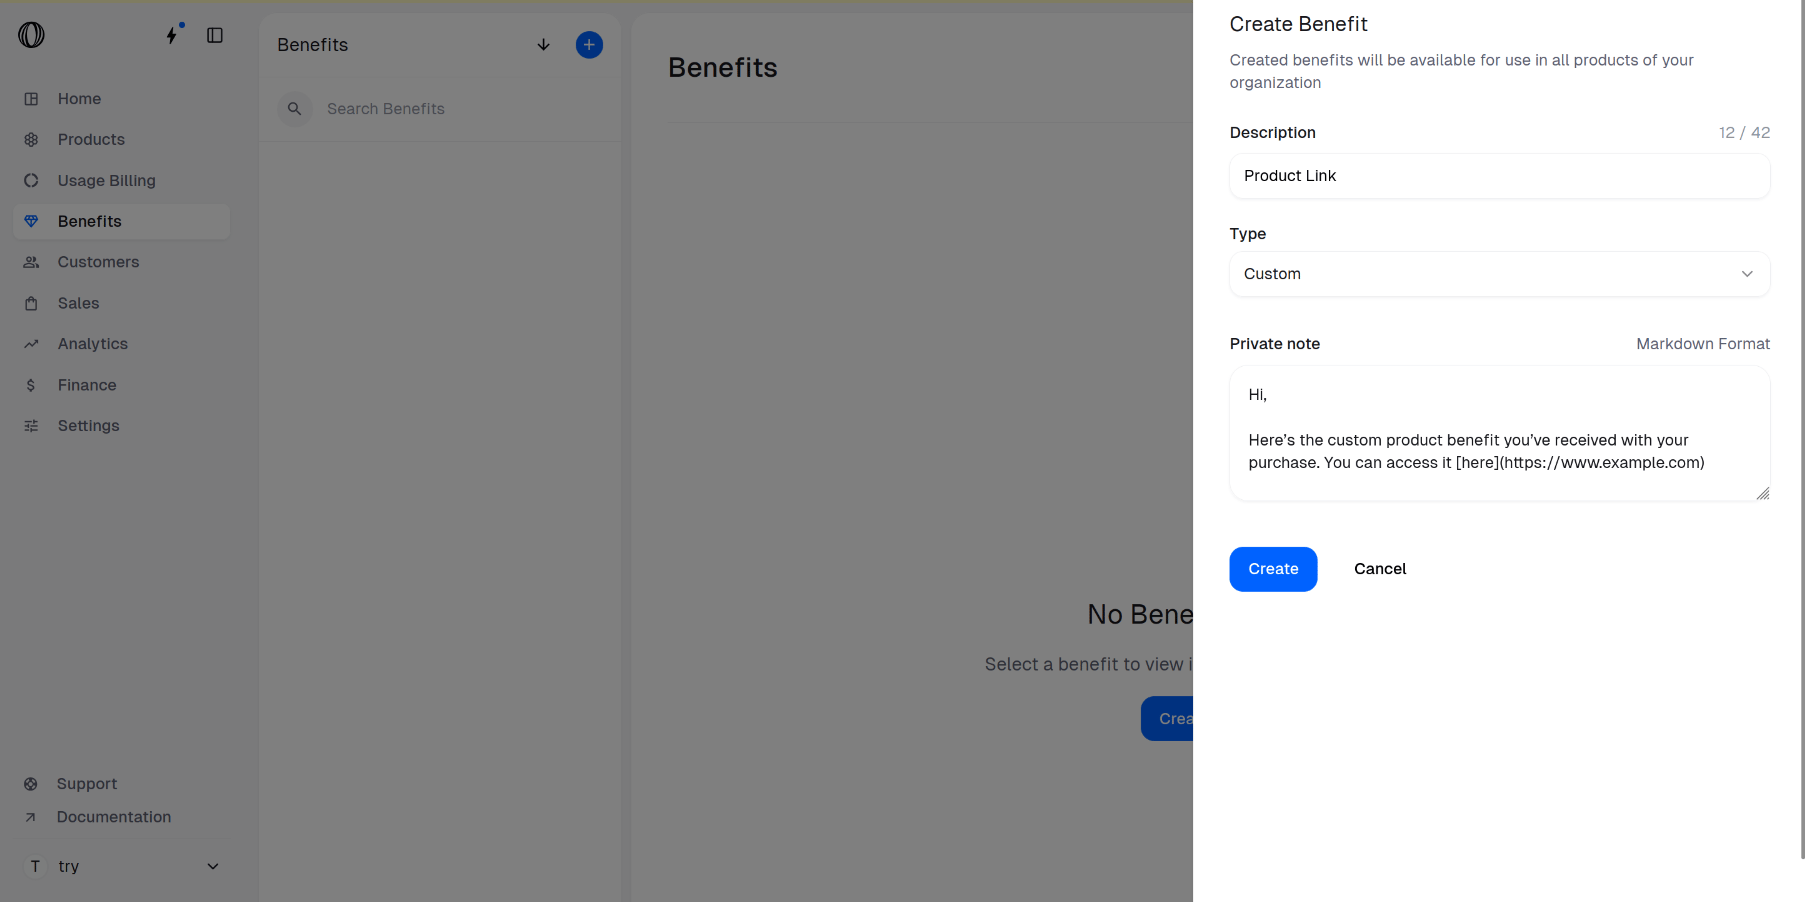 Your Custom link benefit is now saved and ready to attach to any product.
 ## Step 2 — Attach it to a product
In the sidebar, go to **Products** > **Catalogue**.
Direct link: `https://macropay.ai/dashboard/${org_slug}/products`.
## Step 2 — Attach it to a product
In the sidebar, go to **Products** > **Catalogue**.
Direct link: `https://macropay.ai/dashboard/${org_slug}/products`.
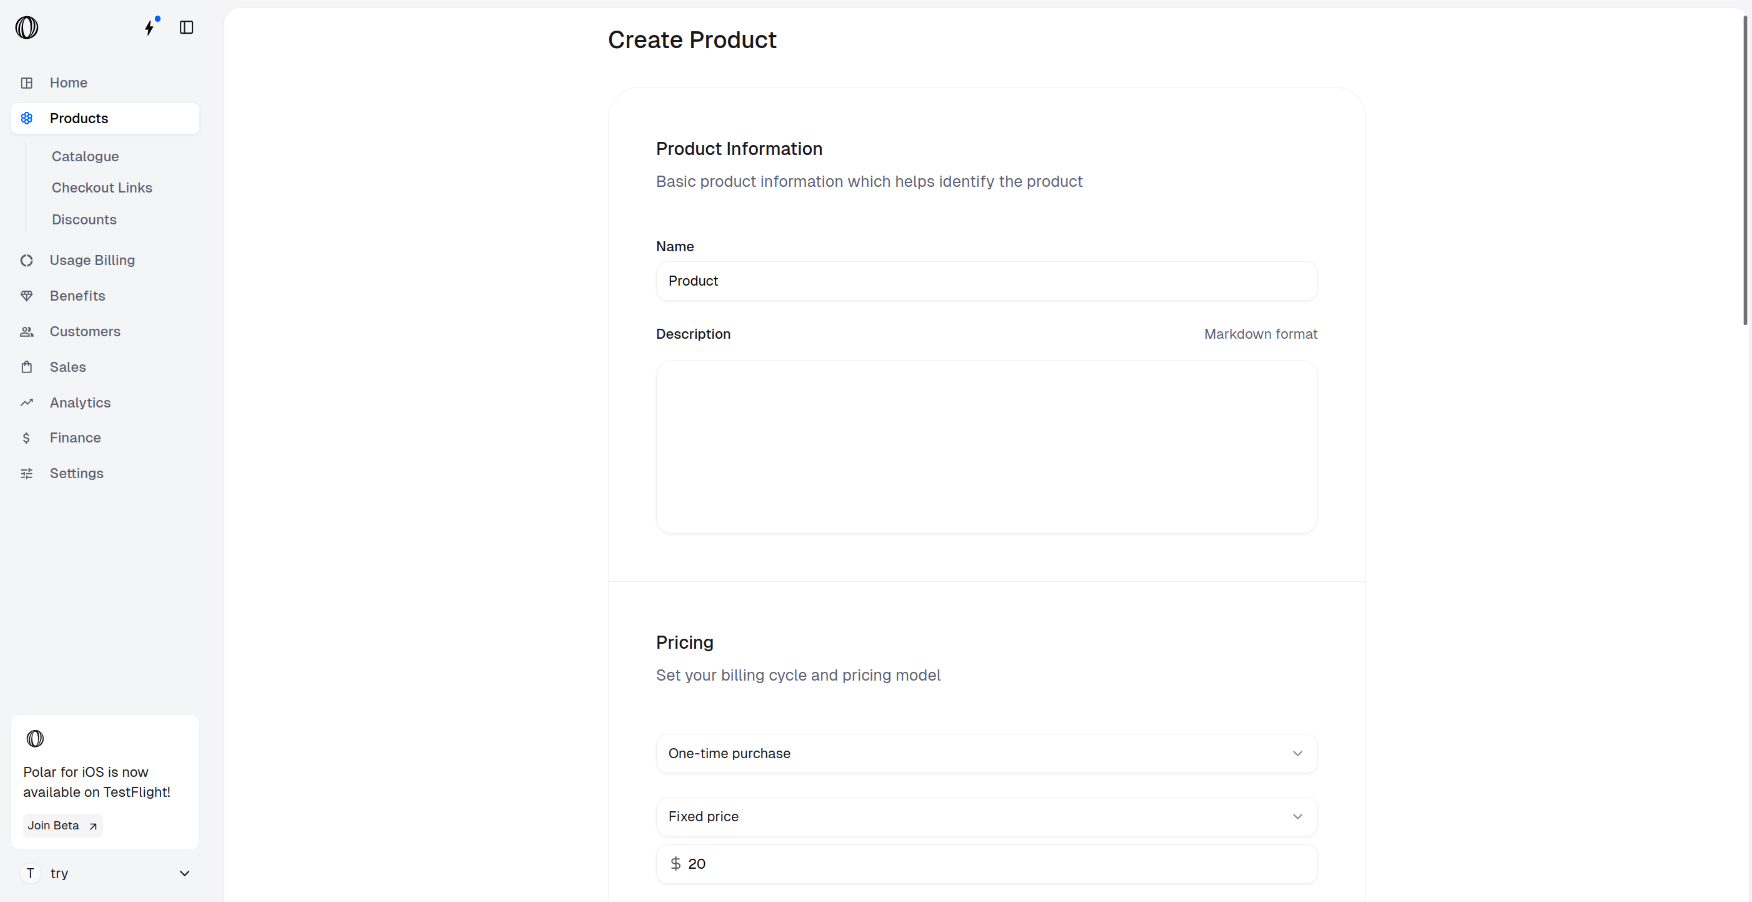
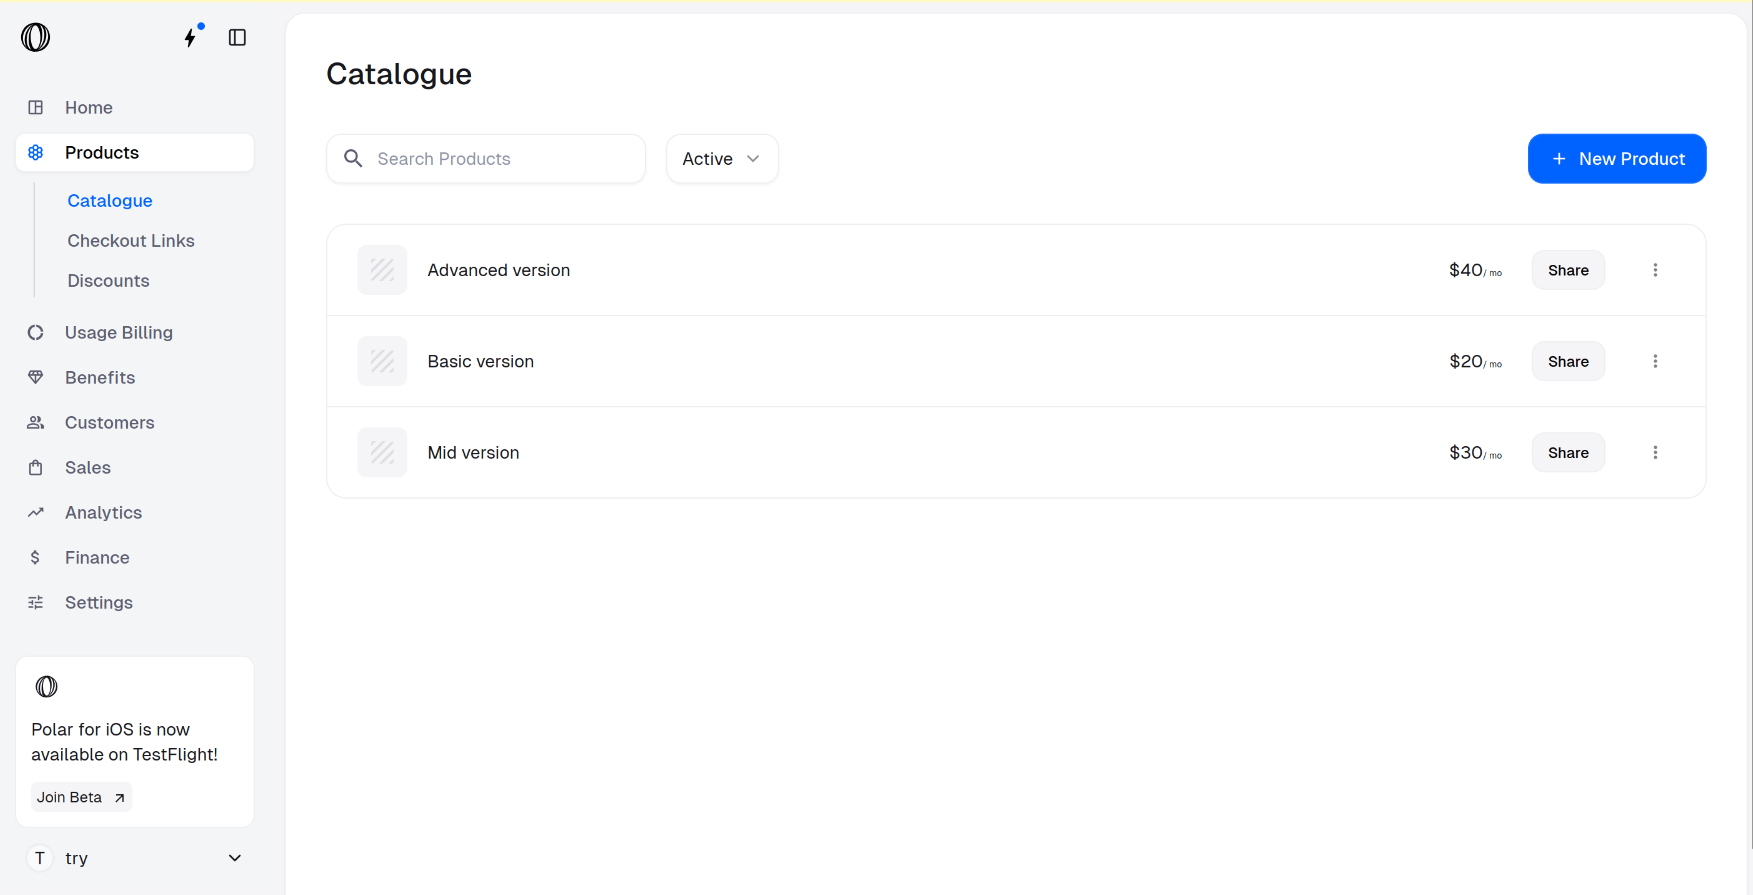 Click **New Product** and fill in the product details — name, description, and pricing. This works for one-time products and subscriptions alike, since both share the same data model.
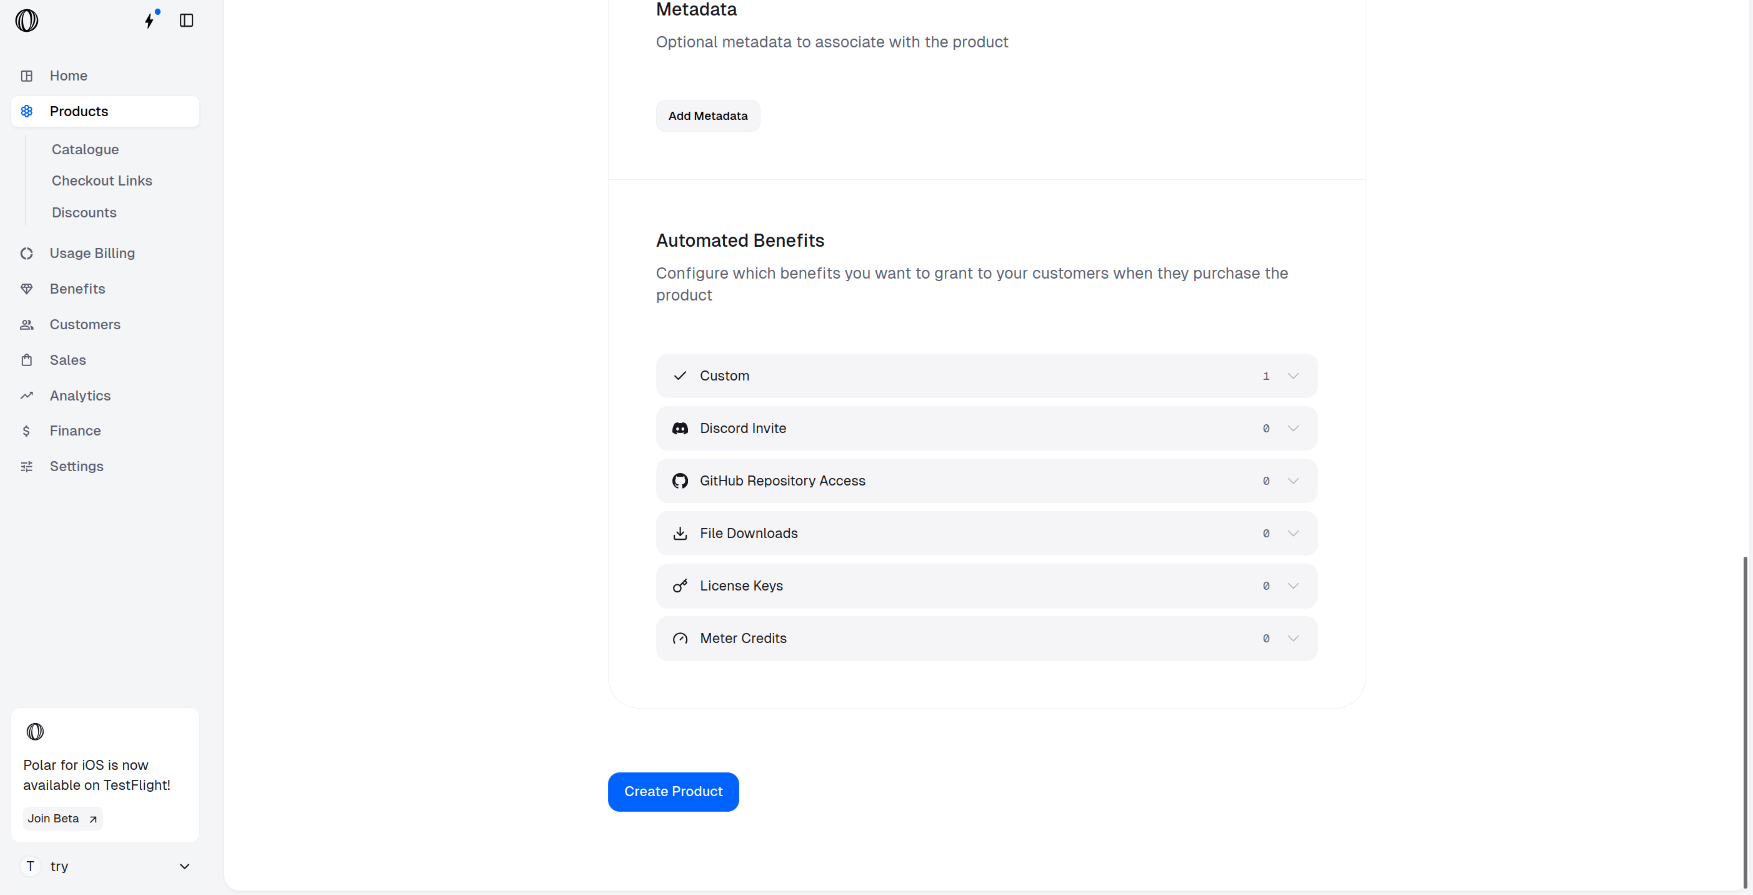
 Scroll to the bottom of the product form to the **Automated Benefits** section.
 Click **Custom** to list the custom benefits you've created, then toggle ON the one you want this product to grant.
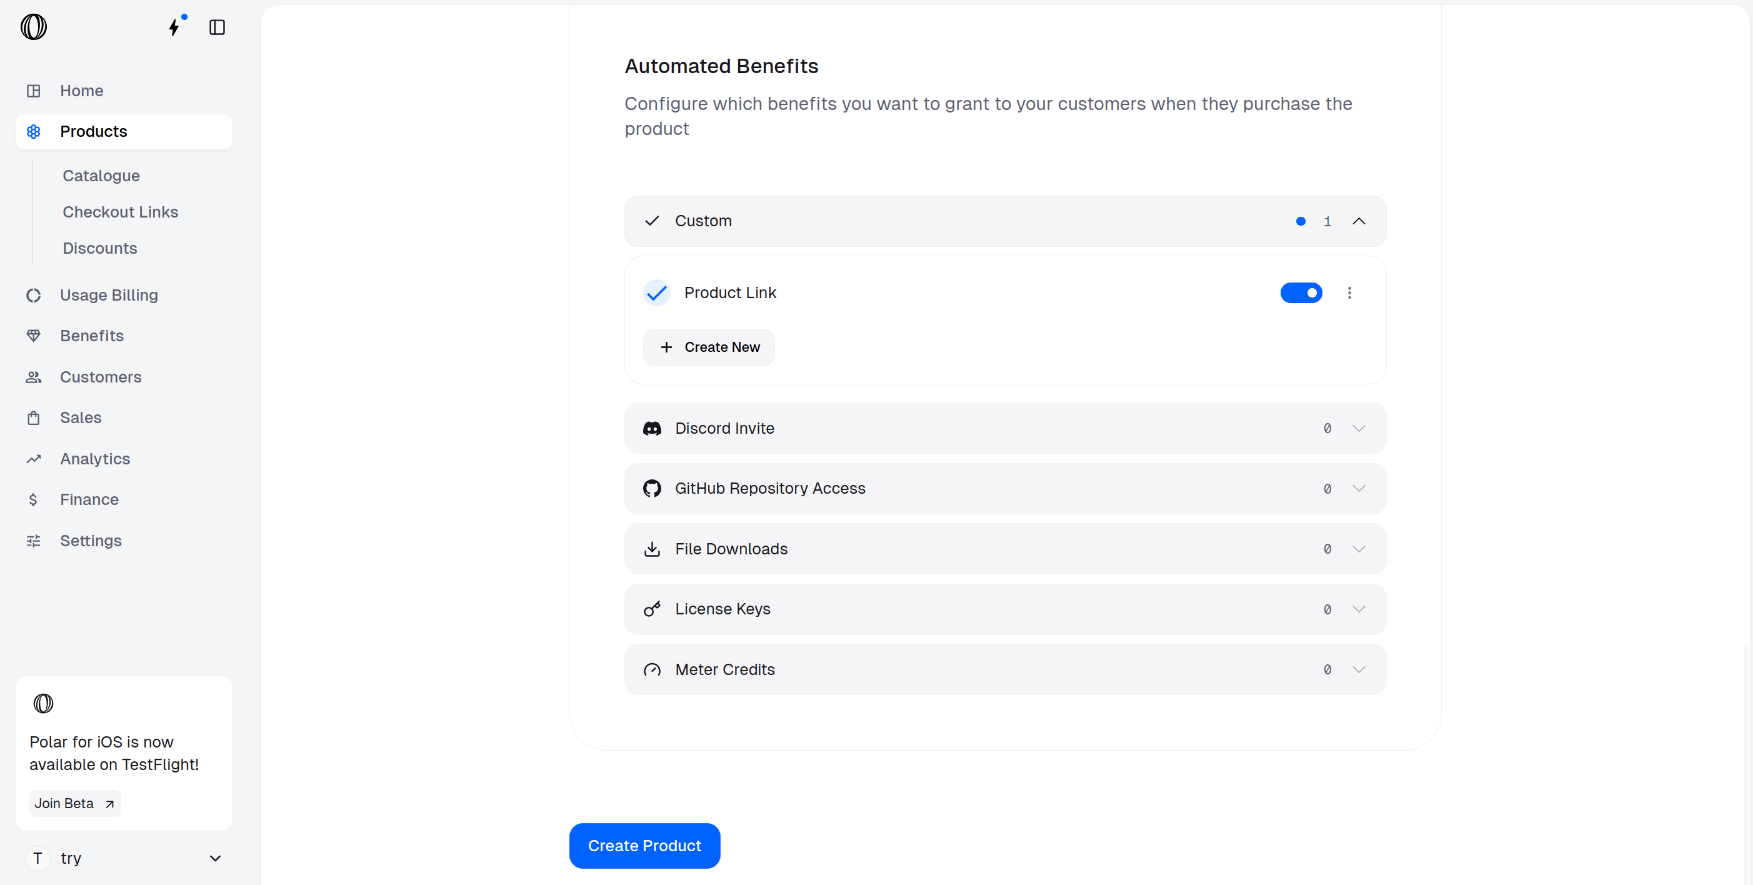 Need a new benefit instead of an existing one? Click **Create new** and fill in the configuration exactly as in [Step 1 — Create the Custom Benefit](#configuration-fill).
 Click **Create Product**.
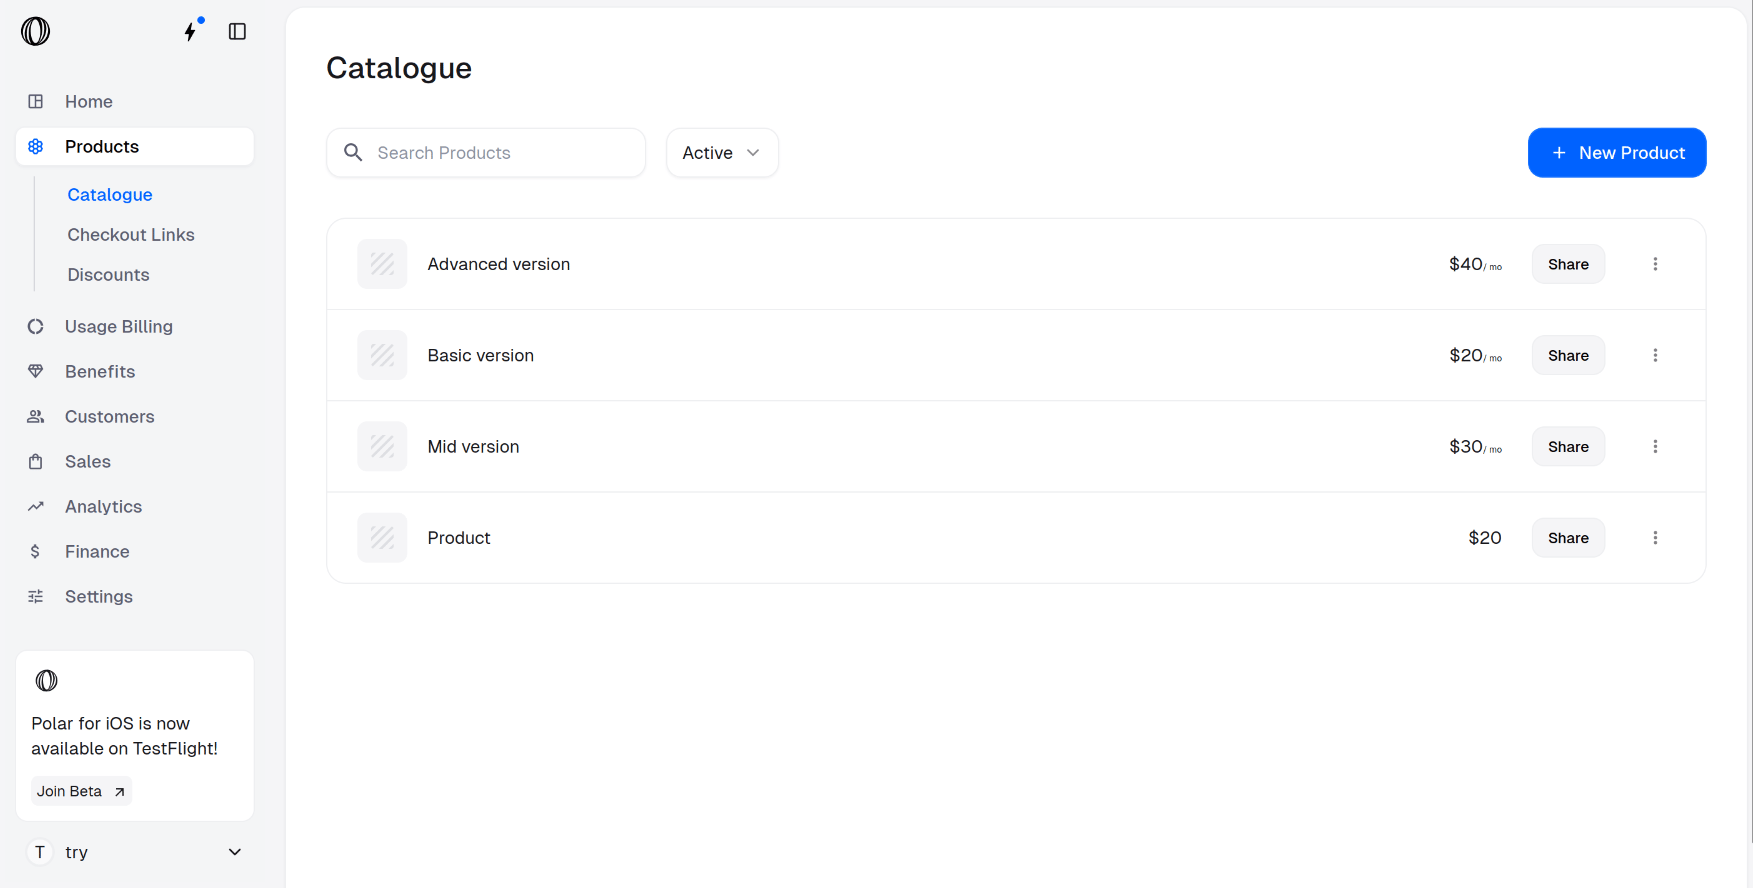 The product is now live, and every purchase will automatically grant the Custom Benefit — delivering your link without any manual step.
## Where the link shows up
Once the benefit is attached, your customer sees it at every touchpoint of the purchase. The link inside the **Private note** stays hidden until the payment completes.
| Touchpoint | What the customer sees |
| ------------------- | ------------------------------------------------------------- |
| Checkout page | The benefit **Description** under **Included**, before paying |
| Confirmation screen | Description, benefit type, and the rendered Markdown link |
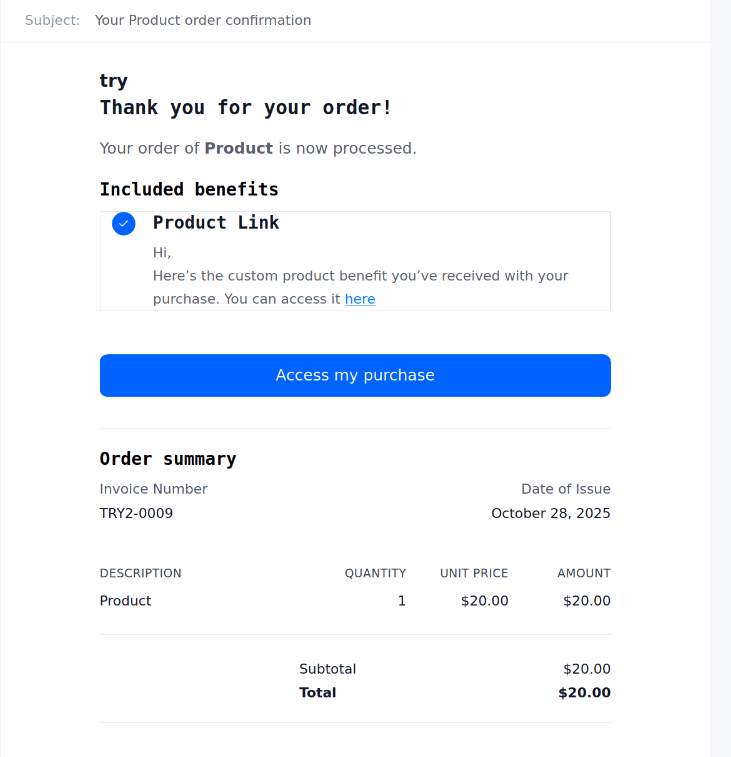
| Receipt email | Description plus the rendered Markdown content |
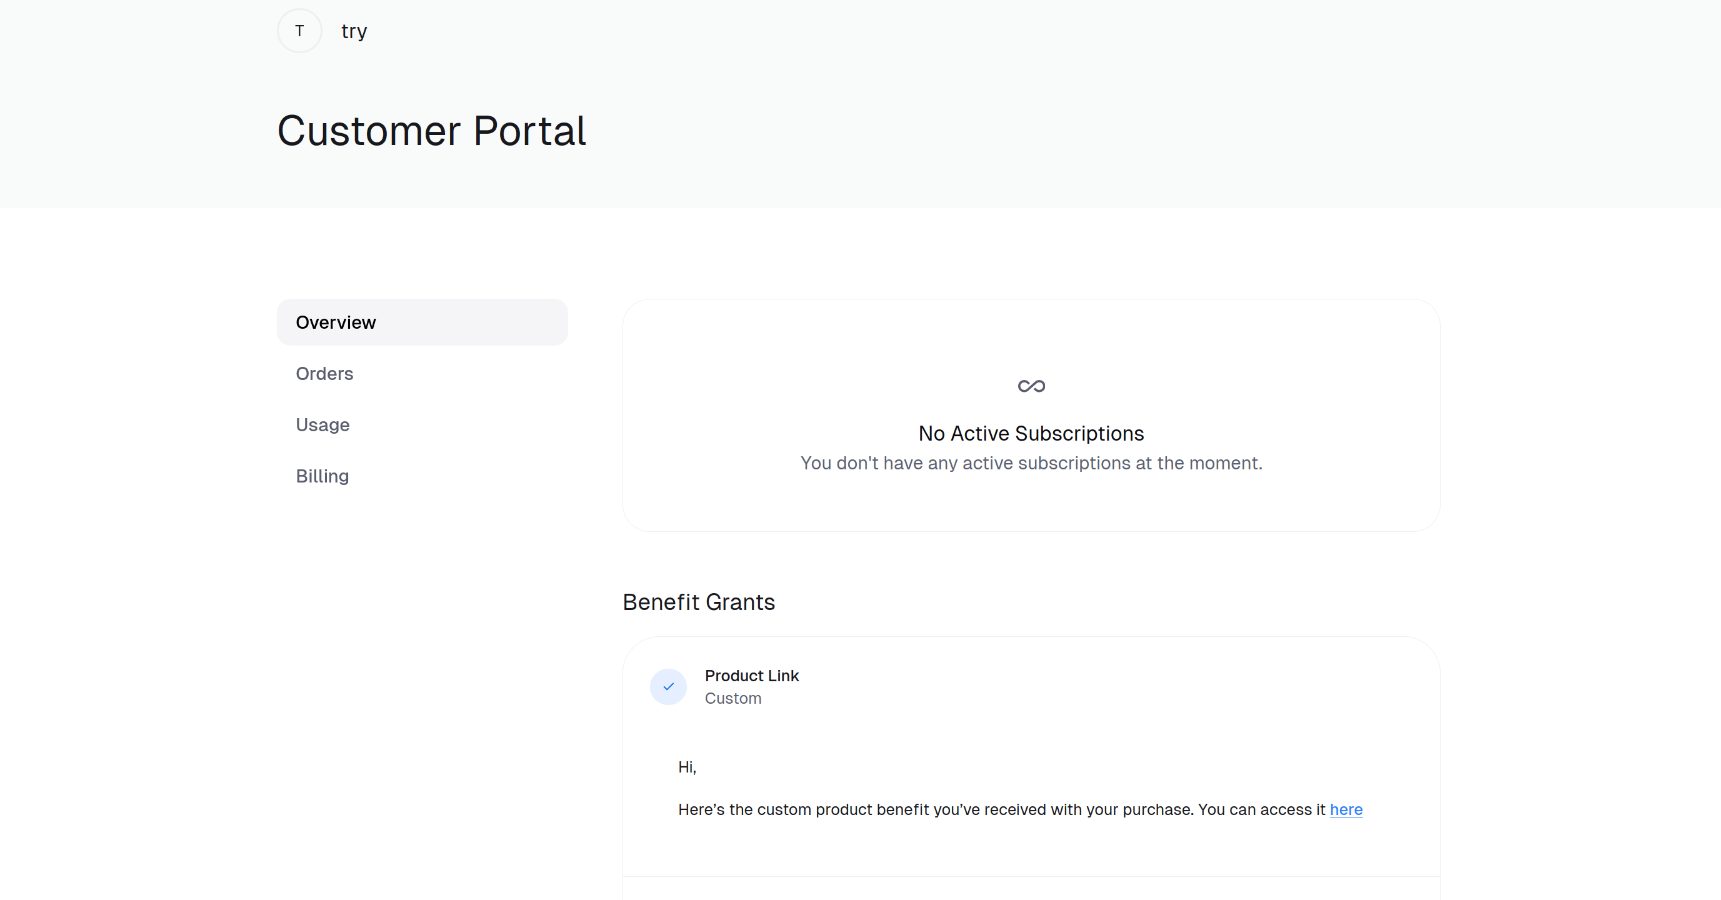
| Customer portal | The full benefit, on demand, any time after purchase |
### On the checkout page
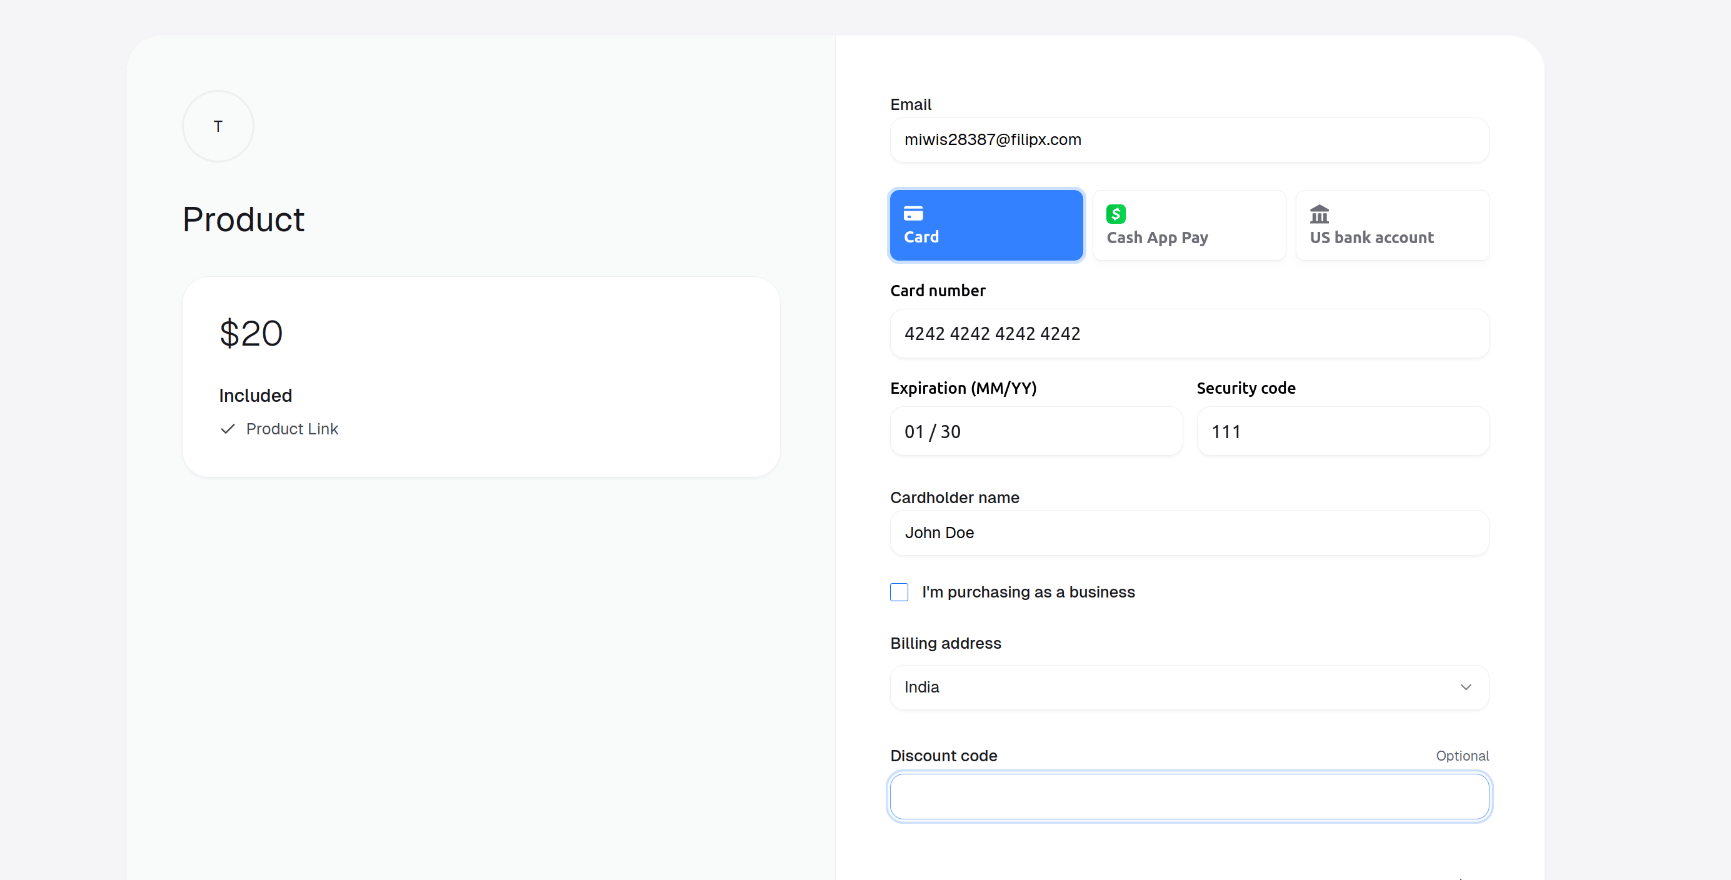
When a customer opens checkout, the **Description** of your Custom Benefit appears under **Included** — so they know what they're getting before they pay. The link itself stays gated.
The product is now live, and every purchase will automatically grant the Custom Benefit — delivering your link without any manual step.
## Where the link shows up
Once the benefit is attached, your customer sees it at every touchpoint of the purchase. The link inside the **Private note** stays hidden until the payment completes.
| Touchpoint | What the customer sees |
| ------------------- | ------------------------------------------------------------- |
| Checkout page | The benefit **Description** under **Included**, before paying |
| Confirmation screen | Description, benefit type, and the rendered Markdown link |
| Receipt email | Description plus the rendered Markdown content |
| Customer portal | The full benefit, on demand, any time after purchase |
### On the checkout page
When a customer opens checkout, the **Description** of your Custom Benefit appears under **Included** — so they know what they're getting before they pay. The link itself stays gated.
 ### Right after purchase
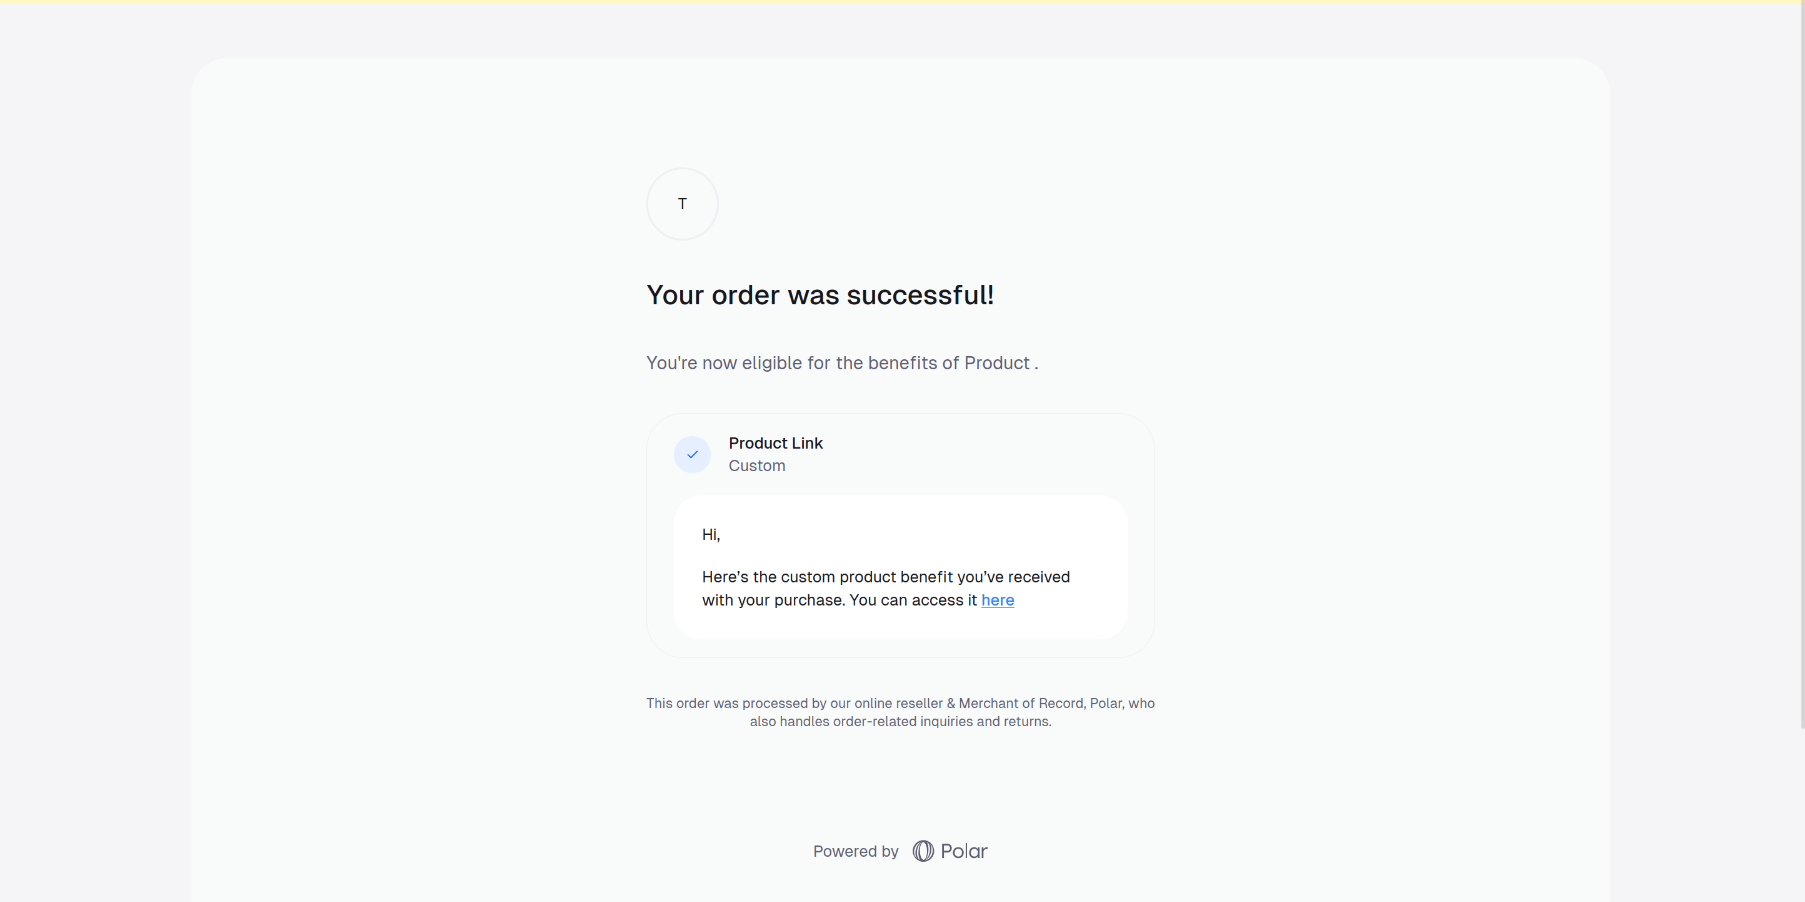
The moment payment succeeds, the confirmation screen renders the **Description**, the **Benefit Type** (here, **Custom**), and the Markdown from your **Private note** — making your link immediately clickable.
### Right after purchase
The moment payment succeeds, the confirmation screen renders the **Description**, the **Benefit Type** (here, **Custom**), and the Markdown from your **Private note** — making your link immediately clickable.
 ### In the confirmation email
Macropay also includes the **Description** and rendered Markdown in the purchase confirmation email, so the link reaches the customer's inbox automatically.
### In the confirmation email
Macropay also includes the **Description** and rendered Markdown in the purchase confirmation email, so the link reaches the customer's inbox automatically.
 ### In the customer portal
Following the link in their confirmation email opens the [customer portal](/features/customer-portal), where the Custom Benefit — and your link — stay available whenever the customer returns.
### In the customer portal
Following the link in their confirmation email opens the [customer portal](/features/customer-portal), where the Custom Benefit — and your link — stay available whenever the customer returns.
 Reuse one Custom Benefit across many products. Update the **Private note** once — say, when your Discord invite or onboarding URL changes — and every product granting that benefit serves the new link going forward.