> ## Documentation Index
> Fetch the complete documentation index at: https://docs.macropay.ai/llms.txt
> Use this file to discover all available pages before exploring further.
# How to Customize Products Order in Checkouts
> Control exactly which products appear in a checkout — and in what order — using the Macropay API.
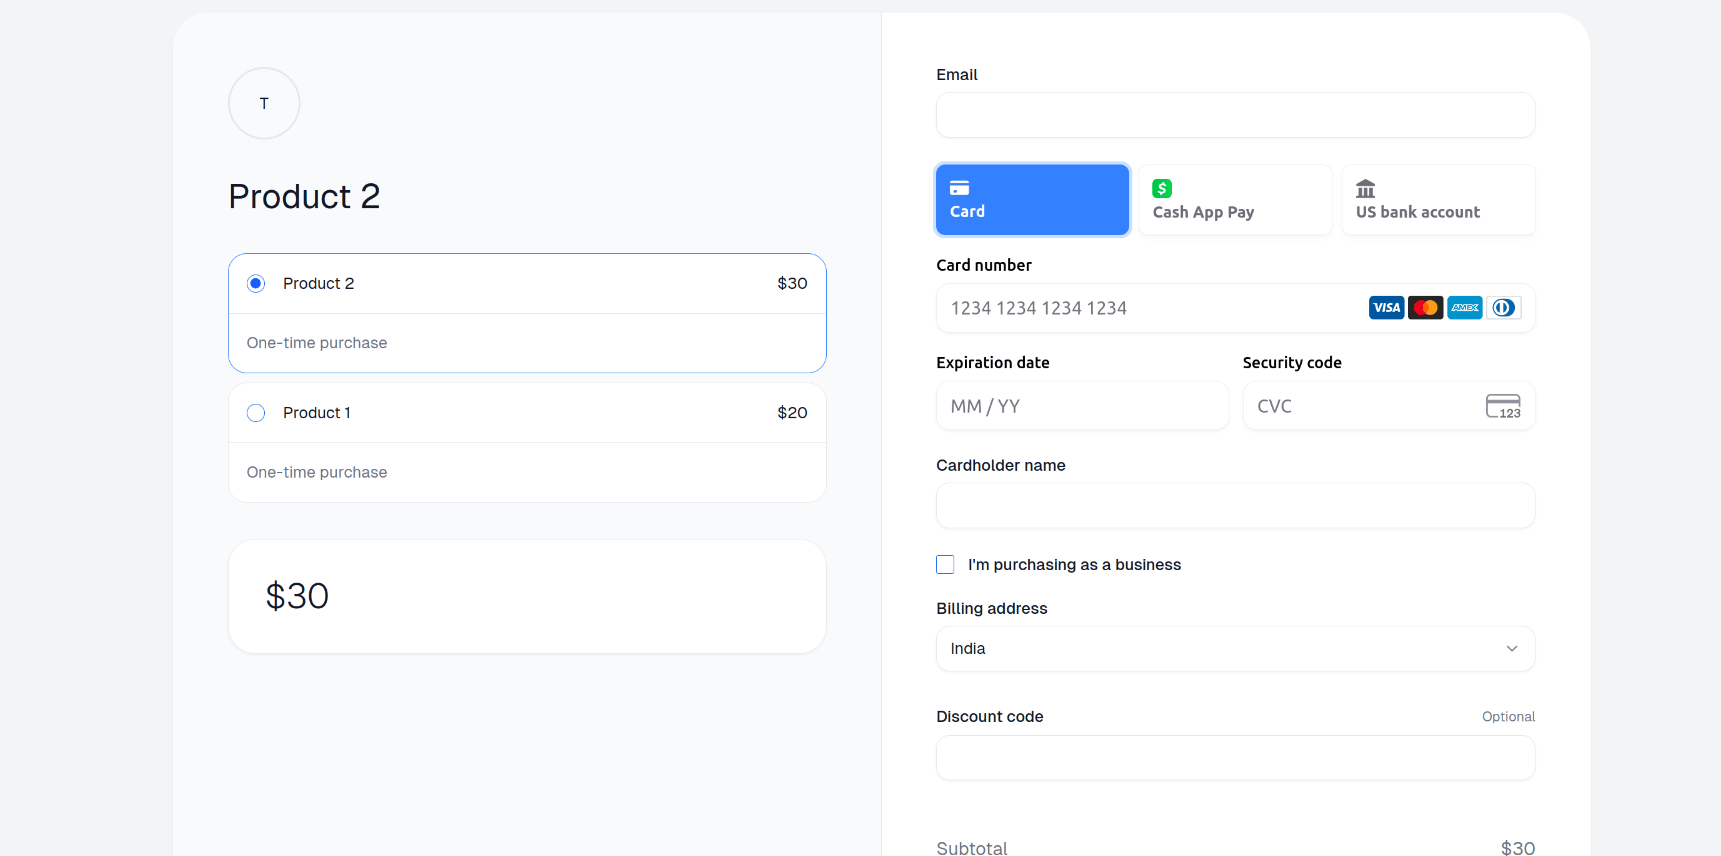
When you put several products in front of a buyer, sequence is leverage. The first option anchors the decision; the order you list products in is the order they render on the hosted checkout. Macropay gives you that control through the API: the position of each product ID in your request is the position it occupies on the page.
Because Macropay is the **merchant of record**, every one of these checkouts also handles sales tax and VAT, runs through a PCI DSS Level 1 compliant flow, and settles under our entity — so reordering products is purely a presentation decision, with no compliance strings attached.
Reordering the products shown in a checkout is currently an **API-only** capability. There is no dashboard toggle for it yet.
## What you'll need
| Requirement | Where it comes from |
| ---------------------------- | --------------------------------------------------------------------------------------------- |
| An organization access token | Create one via the [Organization Access Tokens](https://docs.macropay.ai/integrate/oat) guide |
| The right scope | `checkout_links:write` for links, `checkouts:write` for sessions |
| Product IDs | Copied from your **Products → Catalogue** in the dashboard |
## Step 1 — Get a token and your product IDs
Follow the [Organization Access Tokens](https://docs.macropay.ai/integrate/oat) guide to create a token. After it's generated, copy it immediately — it's shown only once.
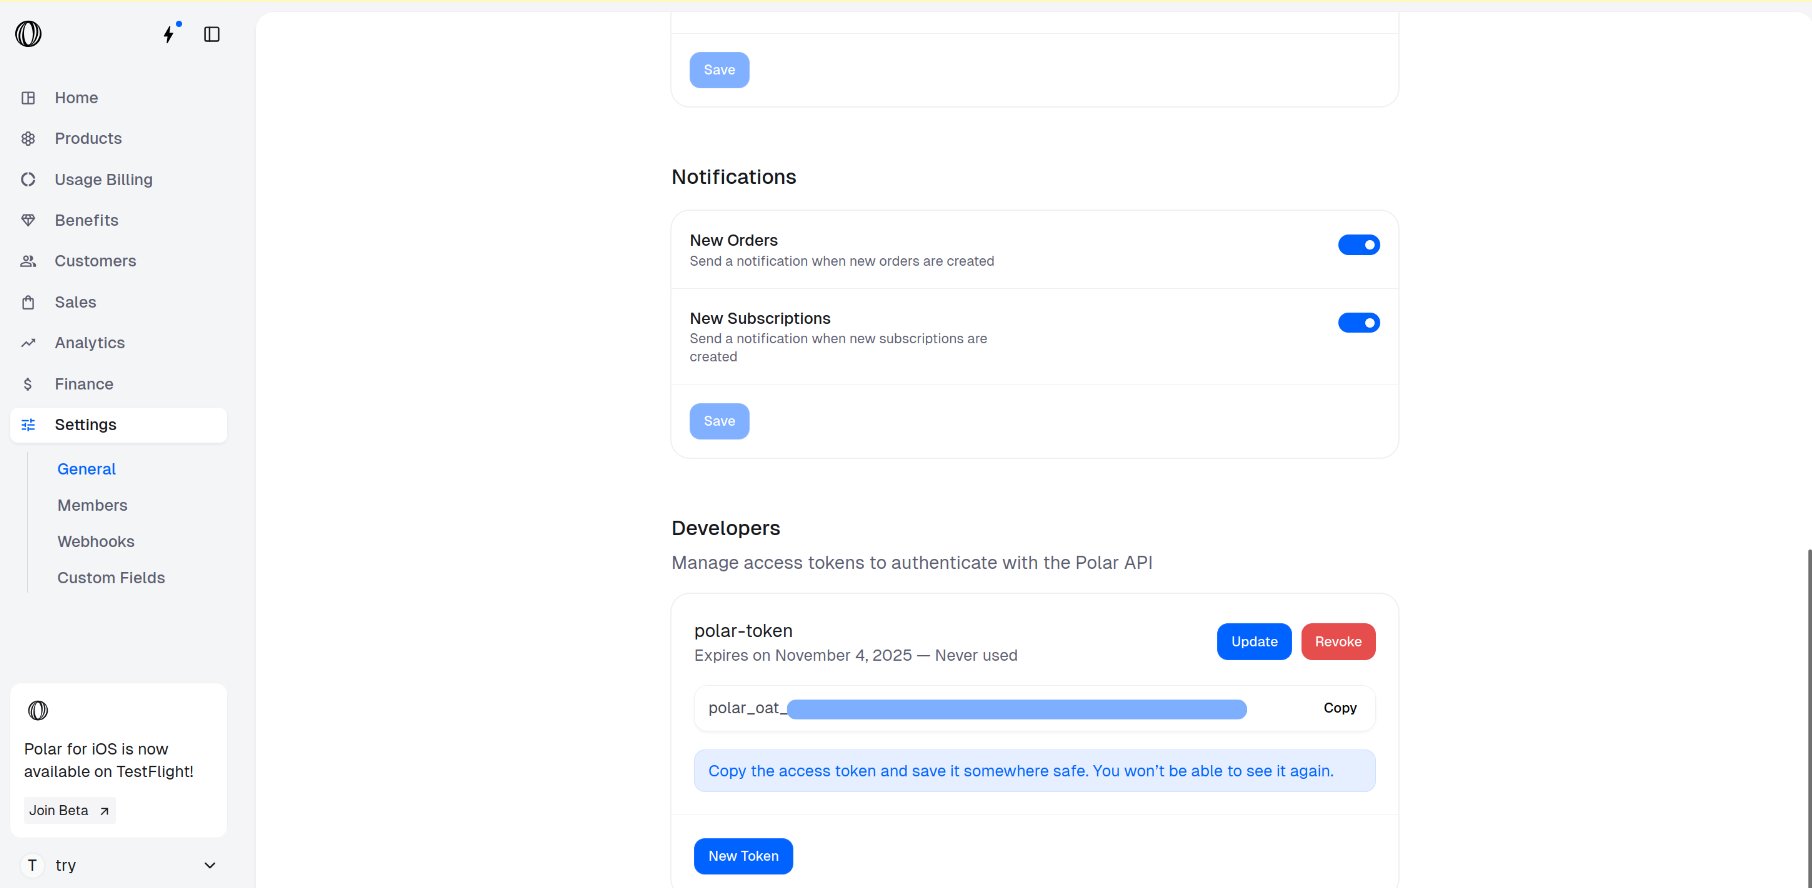 In the dashboard sidebar, go to **Products → Catalogue**, or jump straight to `https://macropay.ai/dashboard/${org_slug}/products`.
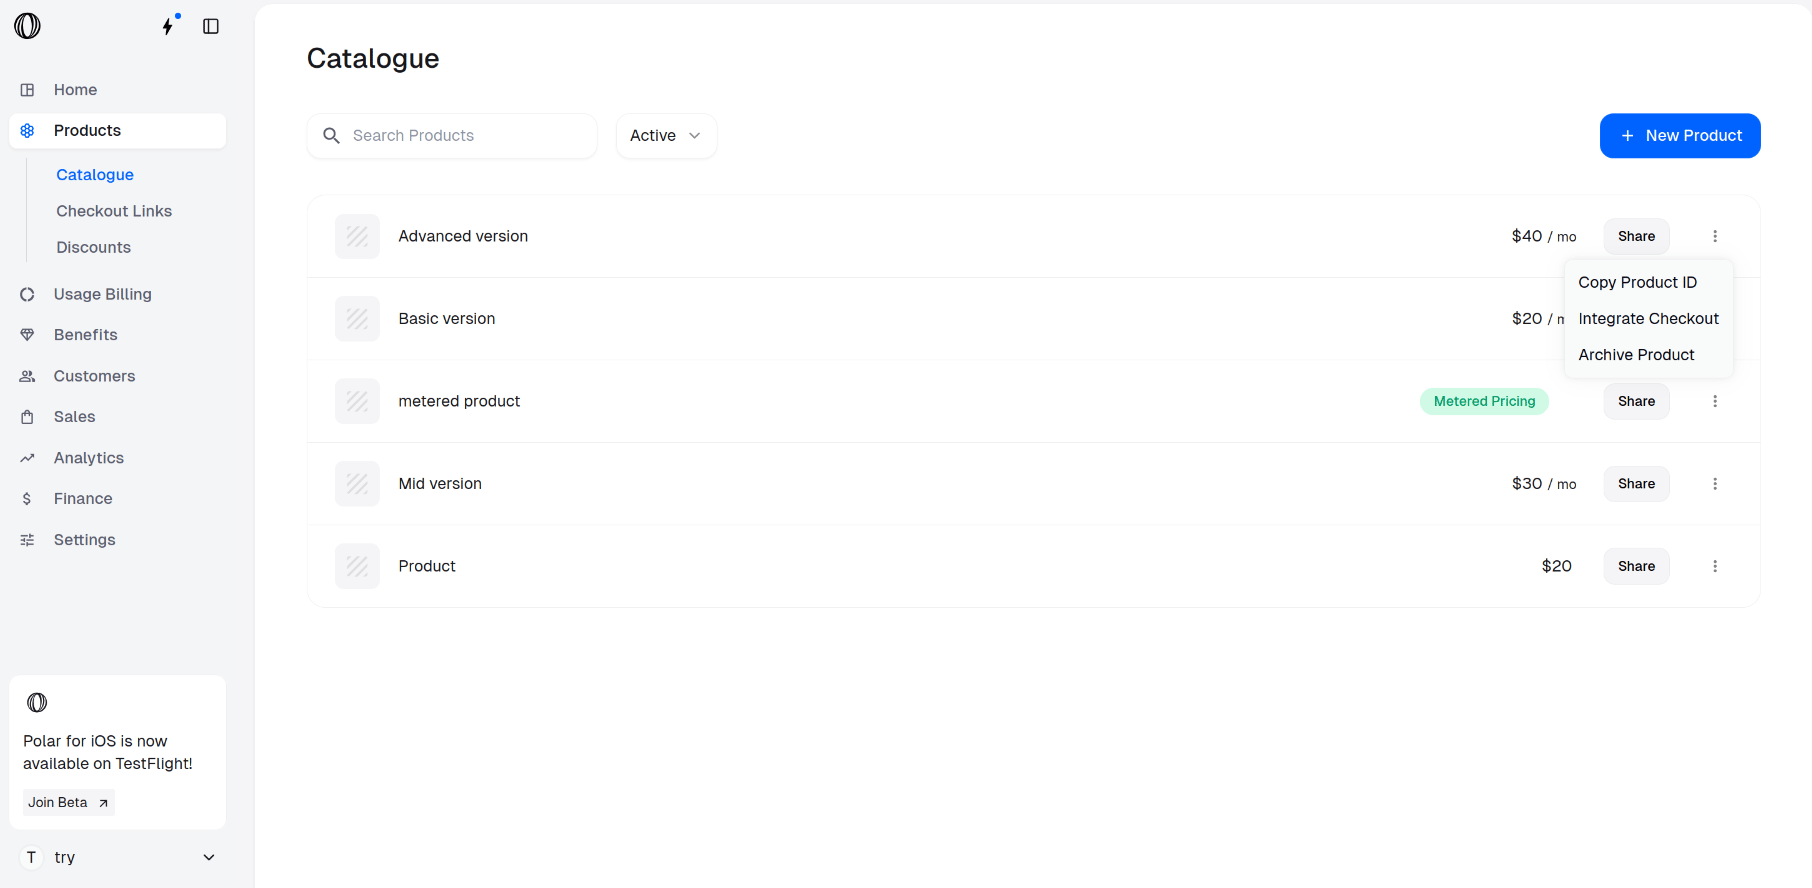
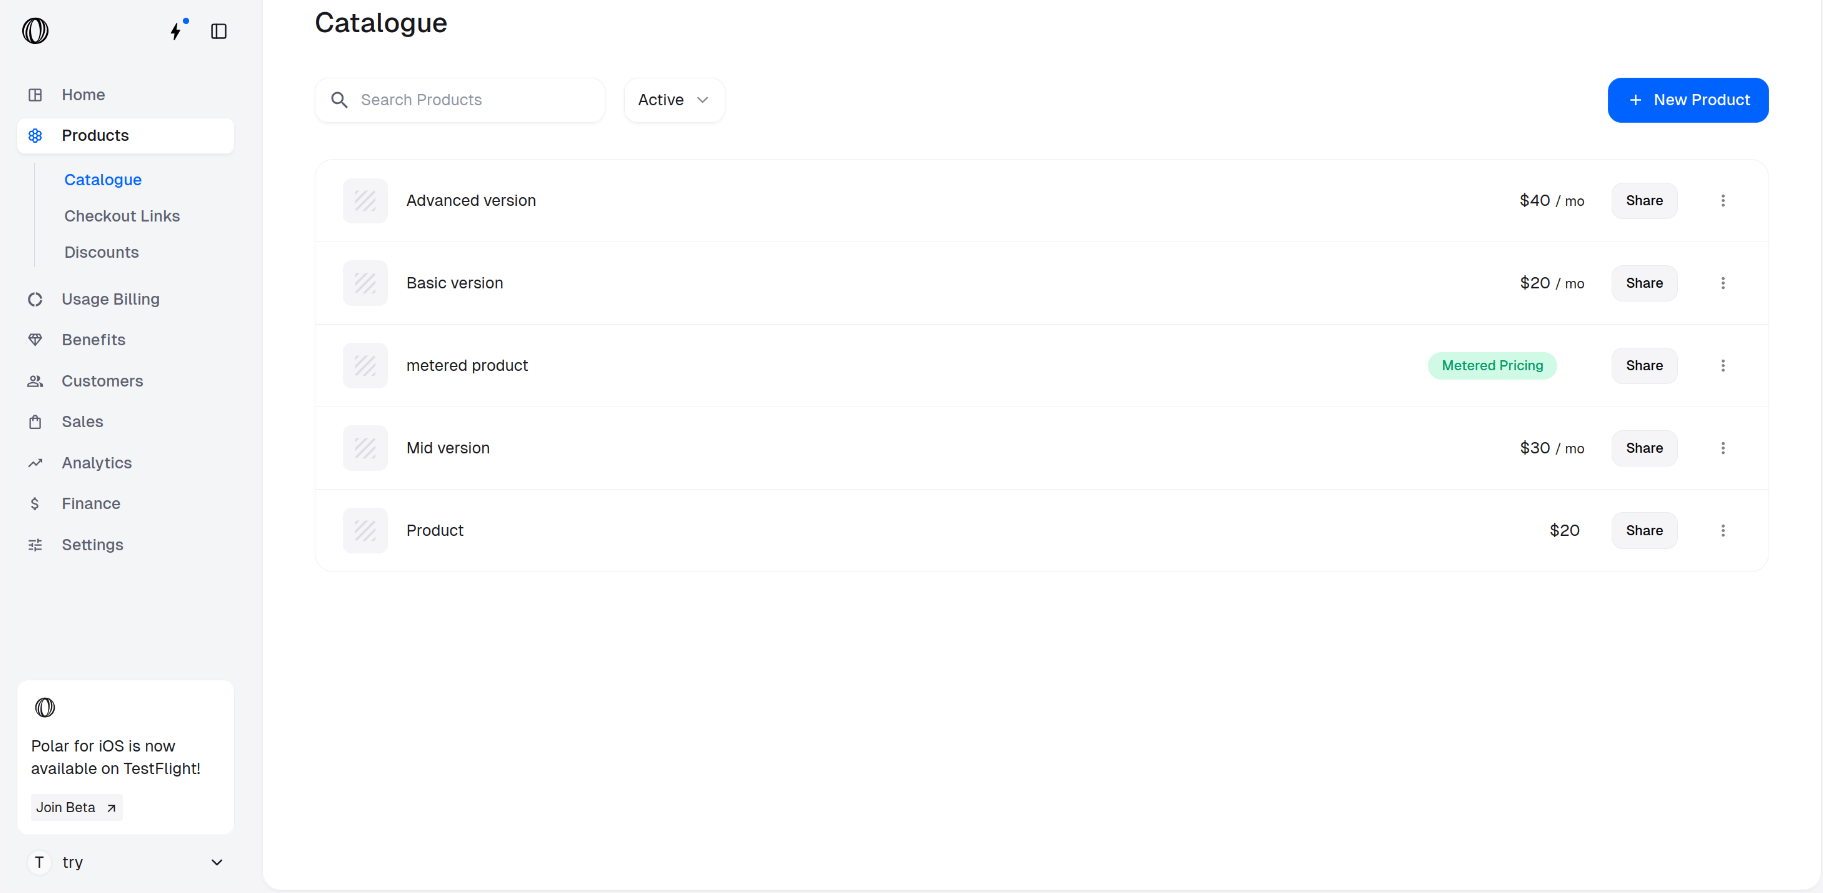 For every product you want in the checkout, open the **⋮ (More options)** menu beside it and choose **Copy Product ID**. Keep these handy — the order you list them in next is the order buyers will see.
 ## Step 2 — Order products in a checkout link
Checkout links are reusable, shareable URLs — drop one in an email, a docs page, or a Slack message and anyone who opens it lands on a ready-to-pay checkout. The `products` array sets the order.
Replace `` with your token, then list the product IDs top-to-bottom in the order you want them rendered.
Your token needs the **`checkout_links:write`** scope to call the [Create Checkout Link](/api-reference/checkout-links/create) endpoint.
```bash Terminal theme={null}
curl --request POST \
--url https://api.macropay.ai/v1/checkout-links/ \
--header 'Authorization: Bearer ' \
--header 'Content-Type: application/json' \
--data '{
"products": [
"",
""
]
}'
```
Every available parameter is documented in the [Create Checkout Link API reference](https://docs.macropay.ai/api-reference/checkout-links/create).
The response is JSON. Grab the `url` field and open it in a browser.
```json theme={null}
{
"...": "...",
"...": "...",
"url": "https://buy.macropay.ai/macropay_cl_..." // [!code ++]
}
```
With the Starter plan listed first, it appears first on the page:
## Step 2 — Order products in a checkout link
Checkout links are reusable, shareable URLs — drop one in an email, a docs page, or a Slack message and anyone who opens it lands on a ready-to-pay checkout. The `products` array sets the order.
Replace `` with your token, then list the product IDs top-to-bottom in the order you want them rendered.
Your token needs the **`checkout_links:write`** scope to call the [Create Checkout Link](/api-reference/checkout-links/create) endpoint.
```bash Terminal theme={null}
curl --request POST \
--url https://api.macropay.ai/v1/checkout-links/ \
--header 'Authorization: Bearer ' \
--header 'Content-Type: application/json' \
--data '{
"products": [
"",
""
]
}'
```
Every available parameter is documented in the [Create Checkout Link API reference](https://docs.macropay.ai/api-reference/checkout-links/create).
The response is JSON. Grab the `url` field and open it in a browser.
```json theme={null}
{
"...": "...",
"...": "...",
"url": "https://buy.macropay.ai/macropay_cl_..." // [!code ++]
}
```
With the Starter plan listed first, it appears first on the page:
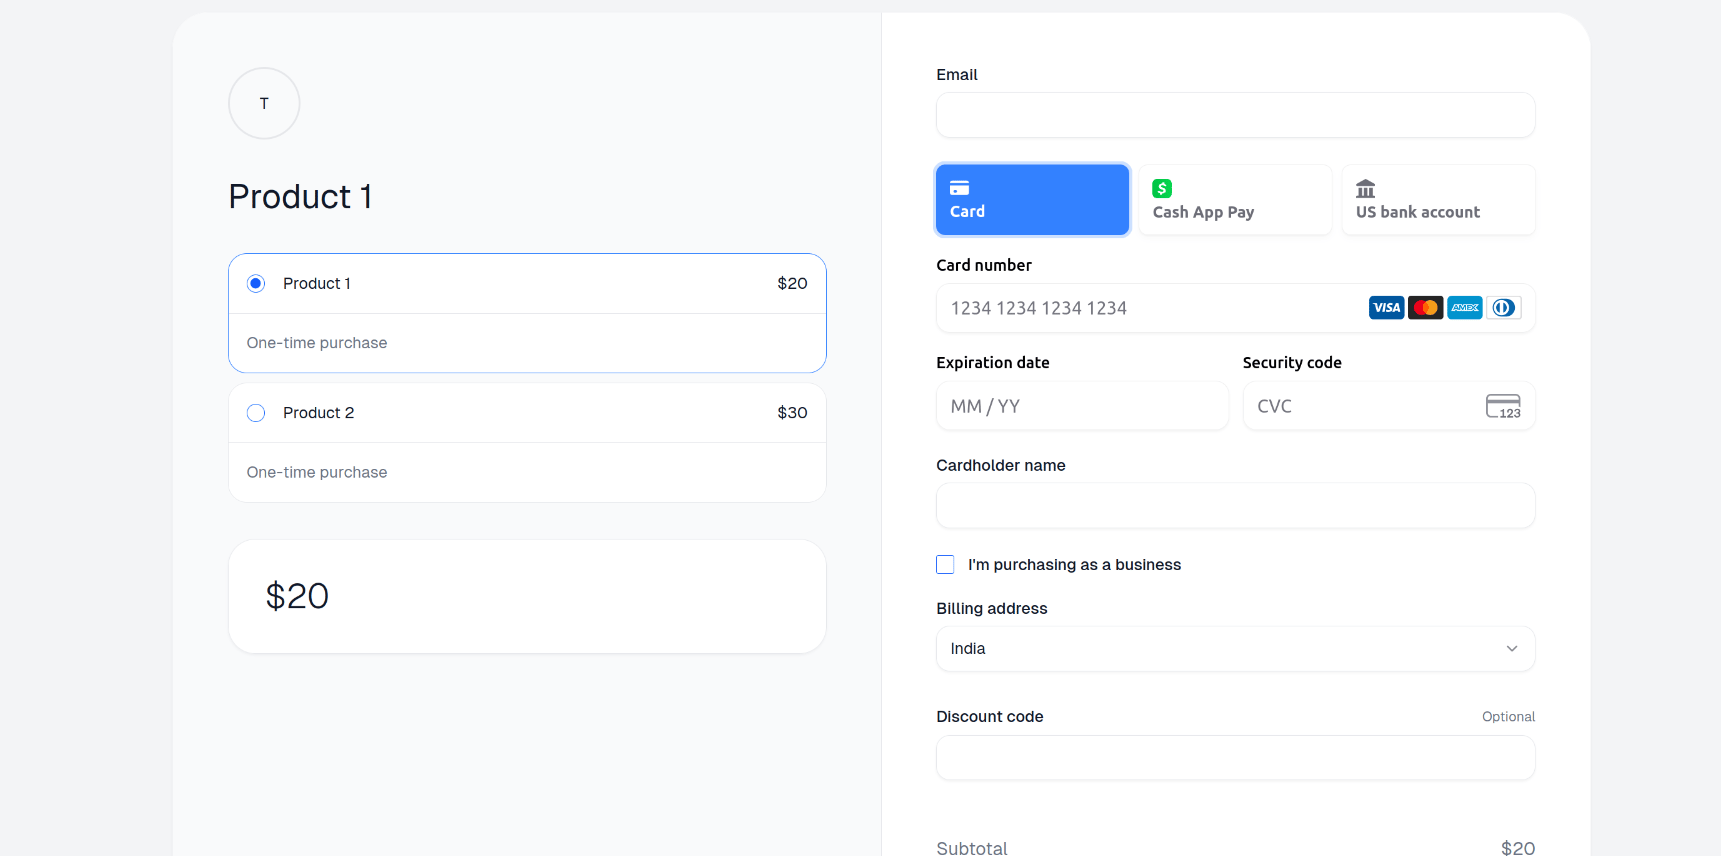 Want the Pro plan to lead instead? Swap the array so its ID comes first.
```bash Terminal theme={null}
curl --request POST \
--url https://api.macropay.ai/v1/checkout-links/ \
--header 'Authorization: Bearer ' \
--header 'Content-Type: application/json' \
--data '{
"products": [
"",
""
]
}'
```
The checkout now leads with the Pro plan:
Want the Pro plan to lead instead? Swap the array so its ID comes first.
```bash Terminal theme={null}
curl --request POST \
--url https://api.macropay.ai/v1/checkout-links/ \
--header 'Authorization: Bearer ' \
--header 'Content-Type: application/json' \
--data '{
"products": [
"",
""
]
}'
```
The checkout now leads with the Pro plan:
 ## Step 3 — Order products in a checkout session
Checkout sessions are best when you create a fresh checkout per buyer — for example, generating one on the fly when a customer clicks "Upgrade" or when an automation (Zapier, Raycast, or your own agent) needs a single-use payment URL. The ordering rule is identical: the `products` array decides the layout.
Replace `` and list the product IDs in the order you want them shown.
Your token needs the **`checkouts:write`** scope to call the [Create Checkout Session](/api-reference/checkouts/create-session) endpoint.
```bash Terminal theme={null}
curl --request POST \
--url https://api.macropay.ai/v1/checkouts/ \
--header 'Authorization: Bearer ' \
--header 'Content-Type: application/json' \
--data '{
"products": [
"",
""
]
}'
```
See every parameter in the [Create Checkout Session API reference](https://docs.macropay.ai/api-reference/checkouts/create-session).
Read the `url` field from the JSON response and open it.
```json theme={null}
{
"...": "...",
"url": "https://buy.macropay.ai/macropay_c_...", // [!code ++]
"...": "..."
}
```
Starter first in the request, Starter first on the page:
Reverse the array to lead with the Pro plan.
```bash Terminal theme={null}
curl --request POST \
--url https://api.macropay.ai/v1/checkouts/ \
--header 'Authorization: Bearer ' \
--header 'Content-Type: application/json' \
--data '{
"products": [
"",
""
]
}'
```
The session now presents the Pro plan first:
Links vs. sessions: reach for a **checkout link** when you want one durable URL to reuse across many buyers, and a **checkout session** when you mint a single checkout per buyer. Both honor the same `products` ordering, so you can A/B which arrangement converts best without touching anything else.
## Step 3 — Order products in a checkout session
Checkout sessions are best when you create a fresh checkout per buyer — for example, generating one on the fly when a customer clicks "Upgrade" or when an automation (Zapier, Raycast, or your own agent) needs a single-use payment URL. The ordering rule is identical: the `products` array decides the layout.
Replace `` and list the product IDs in the order you want them shown.
Your token needs the **`checkouts:write`** scope to call the [Create Checkout Session](/api-reference/checkouts/create-session) endpoint.
```bash Terminal theme={null}
curl --request POST \
--url https://api.macropay.ai/v1/checkouts/ \
--header 'Authorization: Bearer ' \
--header 'Content-Type: application/json' \
--data '{
"products": [
"",
""
]
}'
```
See every parameter in the [Create Checkout Session API reference](https://docs.macropay.ai/api-reference/checkouts/create-session).
Read the `url` field from the JSON response and open it.
```json theme={null}
{
"...": "...",
"url": "https://buy.macropay.ai/macropay_c_...", // [!code ++]
"...": "..."
}
```
Starter first in the request, Starter first on the page:
Reverse the array to lead with the Pro plan.
```bash Terminal theme={null}
curl --request POST \
--url https://api.macropay.ai/v1/checkouts/ \
--header 'Authorization: Bearer ' \
--header 'Content-Type: application/json' \
--data '{
"products": [
"",
""
]
}'
```
The session now presents the Pro plan first:
Links vs. sessions: reach for a **checkout link** when you want one durable URL to reuse across many buyers, and a **checkout session** when you mint a single checkout per buyer. Both honor the same `products` ordering, so you can A/B which arrangement converts best without touching anything else.